If you’re a coffee lover, imagine the satisfaction of brewing a cup of coffee made from beans grown right in your backyard! Growing coffee beans at home can be a rewarding and educational experience. Whether you’re an avid gardener or just starting out, this guide will walk you through the entire process, from planting to harvesting. Grab your gardening gloves and let’s get started!
1. Understanding Coffee Plants
Before diving into the practical steps, it’s essential to understand the coffee plant itself. Coffee plants are tropical evergreen shrubs that thrive in warm, humid environments. There are two main species of coffee plants: Coffea arabica and Coffea canephora (commonly known as Robusta). Arabica is often preferred for its superior flavor.
Key Characteristics:
- Height: Coffee plants can grow up to 10-15 feet tall but can be pruned to a manageable size for home gardening.
- Climate: Ideally, they need a temperature range of 60-70°F (15-24°C) and can’t tolerate frost.
- Soil: Well-draining, slightly acidic soil with a pH between 6 and 6.5 is ideal.
- Light: They prefer indirect sunlight but can tolerate some direct morning sun.
2. Getting Started: Sourcing Coffee Seeds or Seedlings
Seeds:
You can purchase raw, unroasted coffee beans (seeds) from a reputable supplier. Make sure they are fresh as older seeds may not germinate well.
Seedlings:
For a head start, you might prefer to buy a young coffee plant from a nursery. This option saves time and simplifies the initial stages of growing.

3. Planting Coffee Beans
Germinating Seeds:
- Soak the Seeds: Start by soaking the seeds in water for 24-48 hours to help soften the outer shell.
- Prepare a Germination Bed: Fill a tray or a small pot with a well-draining potting mix. Slightly press the seeds into the soil without burying them too deep.
- Maintain Moisture: Keep the soil consistently moist but not waterlogged. Cover the tray with plastic wrap to retain humidity.
- Ideal Conditions: Place the tray in a warm area with indirect sunlight. Seeds typically germinate within 6-8 weeks.
Transplanting Seedlings:
- Select a Pot: Use a pot with drainage holes and fill it with a rich, well-draining potting mix.
- Plant the Seedling: Carefully transfer the germinated seedling into the pot, making sure the roots are well-covered with soil.
- Watering: Water the plant thoroughly after transplanting and maintain consistent moisture.
4. Caring for Coffee Plants
Watering:
Coffee plants require a consistent watering schedule. The soil should be kept moist but not soggy. During dry periods, increase the frequency of watering.
Fertilizing:
Use a balanced, slow-release fertilizer every 2-3 months. Organic compost can also be beneficial in providing essential nutrients to the plant.
Pruning:
Prune your coffee plant regularly to encourage bushier growth and to keep it at a manageable size. Remove any dead or diseased branches promptly.
Pests and Diseases:
Coffee plants can be susceptible to pests such as aphids, mites, and scale insects. Treat infestations with insecticidal soap or neem oil. Regularly check for signs of disease, such as leaf rust, and take appropriate action if detected.
Commercial Coffee Urn 100 cups

- 16L Stainless Steel Coffee Dispenser Urn for Quick Brewing
- Hot Beverage Dispenser
- Hot Water Dispenser
- Percolate Coffee Maker with Filter and Water Gauge
5. Harvesting Coffee Cherries
After about 3-4 years, your coffee plant will begin to produce cherries. Here’s how to harvest and process them:
Picking the Cherries:
- Wait until the cherries turn bright red and feel firm to the touch.
- Pick them by hand, ensuring you only select ripe cherries.
Processing the Beans:
- Pulping: Remove the outer pulp of the cherry to reveal the beans inside.
- Fermentation: Place the beans in water for 24-48 hours to ferment and remove any remaining mucilage.
- Drying: Spread the beans out on a drying rack or tray and allow them to dry in the sun for several days. The beans should have a moisture content of around 10-12%.
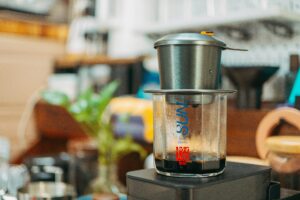
Roasting:
Once the beans are dried, they are ready to be roasted. You can use a home coffee roaster, an oven, or even a stovetop method. Roast the beans until they reach your desired level of roast (light, medium, or dark).
FAQs
1. How long does it take to grow coffee beans at home?
Growing coffee from seed to harvest can take about 3-4 years. However, if you start with a young plant from a nursery, you might see cherries in 1-2 years.
2. Can coffee plants be grown indoors?
Yes, coffee plants can be grown indoors as long as they receive adequate light and humidity. Consider placing them near a south-facing window or using grow lights.
3. What type of soil is best for coffee plants?
Well-draining, slightly acidic soil with a pH between 6 and 6.5 is ideal for coffee plants. Adding organic compost can improve soil quality.
4. How often should I water my coffee plant?
Keep the soil consistently moist but not waterlogged. Water whenever the top inch of soil feels dry to the touch.
5. How do I know when my coffee cherries are ready to harvest?
Coffee cherries are ready to harvest when they turn bright red and feel firm. Avoid picking them too early or too late for the best flavor.
6. Can I grow coffee beans in colder climates?
Coffee plants thrive in warm, humid environments. In colder climates, grow them in pots so they can be moved indoors during cold weather.
—
Growing coffee beans at home is a delightful journey that connects you with the origins of your favorite beverage. With patience and care, you can enjoy the unique experience of savoring coffee made from your homegrown beans. Happy gardening, and may your coffee always be fresh and flavorful!