Ever craved those gourmet chocolate-covered coffee beans, but balked at the price tag? Well, fret no more, fellow coffee enthusiast! With a little creativity and these handy tips, you can transform ordinary coffee beans into a decadent and delicious homemade treat. Imagine turning ordinary paint supplies into a stunning masterpiece – we’re about to unleash your inner chocolatier!
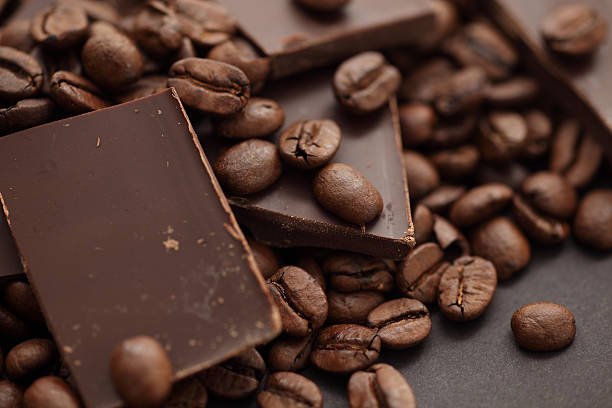
The Bean Basics: Choosing Your Coffee Canvas
The foundation of your chocolate-covered masterpiece lies in the coffee beans themselves. Here’s what to consider:
Roast Level
Lighter roasts tend to have brighter, more acidic flavors that pair well with milk chocolate. Darker roasts offer bolder, richer notes that complement dark chocolate beautifully. Think of choosing the right paint color to complement your artistic vision!
Freshness
Freshly roasted beans boast the most vibrant flavors. Aim for beans roasted within the past two weeks for optimal results. Imagine using fresh paint for the most vivid colors!
Whole vs. Ground
While some recipes use ground coffee, whole beans offer a more visually appealing final product and a satisfying textural contrast with the chocolate. Think of using whole objects for a more interesting collage compared to just using paint splatters!
The Chocolatey Palette: Selecting Your Coating
Next comes the chocolate, the delectable cloak that will envelop your coffee bean canvas. Here are some options:
Melting Chocolate Chips
A readily available and convenient choice. Opt for semi-sweet or dark chocolate chips depending on your preference. Imagine using pre-mixed paints for a quick and easy artistic project!

High-Quality Chocolate Bars
For a more intense chocolate flavor and richer experience, consider using chopped-up dark chocolate bars with a high cocoa percentage (at least 70%). Think of using professional-grade paints for a more vibrant and long-lasting artwork!
White Chocolate
Looking for a sweeter twist? White chocolate can be a delightful alternative, though it lacks the caffeine kick of darker varieties. Think of using white paint for a unique and unexpected artistic choice!
The Tools of the Trade: Gearing Up for Chocolatey Creation
Now, let’s gather the tools you’ll need for your chocolate-dipping adventure:
Heatproof Bowl
For melting your chocolate. Imagine this as your artist’s palette where you’ll mix your paints!
Double Boiler (Optional)
Provides gentle and even heat for melting chocolate. If you don’t have one, a heatproof bowl over a pot of simmering water (not boiling) works just fine. Think of this as a controlled heat source to prevent your paints from burning!
Silicone Spatula
For stirring your melted chocolate and ensuring smooth coating. Imagine this as your paintbrush for applying colour to your coffee bean canvas!
Baking Sheet
Lined with parchment paper, this will be the resting place for your finished chocolate-covered coffee beans. Think of this as your canvas where your artistic creation will come to life!
Cooling Rack (Optional)
Speeds up the chocolate setting process. Imagine this as a drying rack for your freshly painted masterpiece!
The Chocolate Canvas Comes Alive: The Dipping Process
Here’s where the magic happens:
Melt the Chocolate: Using your chosen method, melt your chocolate until smooth and glossy. Be mindful of the heat – overheating can scorch the chocolate and ruin the taste. Imagine carefully melting your paints to avoid them becoming clumpy or unusable!
Prepare the Coffee Beans: Spread your coffee beans on a plate in a single layer. Ensure they are cool and dry. Imagine laying out the objects you want to incorporate into your collage before getting started!
Dip and Coat: Using a spoon or fork, carefully dip each coffee bean into the melted chocolate, ensuring it’s fully coated. Gently tap off any excess chocolate. Think of dipping your paintbrush and carefully applying color to your chosen object!
Place on Baking Sheet: Transfer the chocolate-coated coffee beans to the prepared baking sheet lined with parchment paper. Space them evenly to prevent them from sticking together. Imagine carefully placing your decorated objects onto your canvas!
Setting the Stage: Let the chocolate set completely at room temperature or in the refrigerator. This can take anywhere from 30 minutes to an hour. Imagine letting your artwork dry completely before admiring it!
The Finishing Touches: Adding Flair to Your Creation
Once your chocolate-covered coffee beans are set, you can unleash your inner artist and add some flair:
Drizzle with Melted Chocolate: Create a decorative design or a contrasting color scheme with melted white or dark chocolate. Imagine adding finishing touches like glitter or swirls to your artwork!
- Sprinkle with Toppings: For a touch of texture and extra flavor, consider sprinkles, chopped nuts, or even a pinch of sea salt. Think of adding sequins, beads, or other embellishments for a more interesting collage!
- Get Creative with Flavors: Experiment with different flavored chocolate coatings – think mint, orange, or even chili flakes for a surprising kick! Imagine using unconventional paints or mediums to create a unique artistic statement!
The Sweet Reward: Savoring Your Homemade Creation
Finally, the moment you’ve been waiting for – it’s time to savor your homemade chocolate-covered coffee beans! Pop one in your mouth and appreciate the delightful symphony of flavors and textures. The crispness of the coffee bean, enveloped in smooth chocolate, with a hint of your chosen embellishments – a testament to your creativity and culinary skills!
Beyond the Bean: Tips and Tricks for Success
Here are some additional tips to ensure your chocolate-covered coffee bean adventure is a success:
- Tempering Chocolate (Optional): For a professional-looking finish and a longer shelf life, consider tempering your chocolate. This involves a specific heating and cooling process that creates a smooth, shiny texture. However, it requires a bit more practice and a chocolate thermometer. Imagine learning an advanced artistic technique for a truly impressive result!
- Storage Solutions: Store your homemade chocolate-covered coffee beans in an airtight container in a cool, dry place. They can last for up to two weeks, but trust us, they won’t be around that long! Imagine storing your artwork in a protective case to preserve its beauty!
The Final Nibble: A Celebration of DIY Chocolate-Covered Coffee Beans
Crafting your own chocolate-covered coffee beans is a fun and rewarding experience. It allows you to customize the flavor profile, unleash your creativity, and enjoy the satisfaction of creating a delicious homemade treat. So, gather your supplies, grab your favorite coffee beans, and embark on this delightful chocolatey adventure. After all, a little creativity can transform a simple bean into a gourmet masterpiece – and isn’t that what life’s all about? Happy dipping, and happy indulging!

