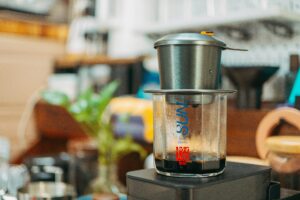
If you’re a coffee lover who also has a sweet tooth, making homemade coffee ice cream is the ultimate treat. This smooth, rich dessert blends bold espresso flavor with creamy indulgence—perfect for hot summer afternoons, dinner parties, or whenever you want to elevate your dessert game.
Table of Contents
The best part? You don’t need fancy equipment or professional skills to make coffee ice cream at home. Whether you have an ice cream maker or prefer a no-churn method, this guide covers everything you need to know to whip up a delicious batch of café-inspired frozen goodness.
Why Make Coffee Ice Cream at Home?
Homemade coffee ice cream offers a depth of flavor that store-bought versions often lack. Most commercial options rely on artificial coffee flavoring, while making it yourself allows you to use real brewed coffee or espresso, ensuring a fresher, more authentic taste.
Plus, you can customize it to your liking. Prefer stronger coffee notes? Add more espresso. Want to reduce the sweetness or make it dairy-free? No problem. From bold and bitter to sweet and silky, the possibilities are endless.
Ingredients You’ll Need
For a classic churned coffee ice cream, here’s a tried-and-true base recipe that yields a creamy texture and full-bodied coffee flavor.
Base Ingredients:
- 2 cups heavy cream
- 1 cup whole milk
- ¾ cup granulated sugar
- 4 egg yolks
- ⅔ cup strongly brewed coffee or 3 shots of espresso (cooled)
- 1 teaspoon vanilla extract
- A pinch of salt
Optional Add-ins:
- Chocolate chips or mocha chunks
- Crushed biscotti
- Swirls of caramel
- A splash of coffee liqueur (like Kahlua or Baileys)
Step-by-Step: Churned Coffee Ice Cream Recipe
Step 1: Brew and Cool the Coffee
Start by brewing a strong cup of coffee or pulling 2–3 shots of espresso. Let it cool completely before incorporating it into the recipe. You can even use cold brew concentrate for a smoother, less acidic flavor.
Step 2: Make the Custard Base
In a medium saucepan, combine milk, sugar, and salt. Heat gently over medium heat, stirring until the sugar dissolves. Do not let it boil.
In a separate bowl, whisk the egg yolks. Slowly pour about half of the warm milk mixture into the yolks while whisking constantly. This process tempers the yolks and prevents them from scrambling.
Return the yolk-milk mixture to the saucepan and cook over low heat. Stir continuously until the custard thickens enough to coat the back of a spoon. This should take 5–7 minutes.
Step 3: Combine with Cream and Coffee
Remove the saucepan from the heat and strain the custard through a fine mesh sieve into a clean bowl. Add the heavy cream, cooled coffee, and vanilla extract. Stir well.
Chill the mixture in the refrigerator for at least 4 hours or overnight. Cold custard churns better and results in smoother texture.
Step 4: Churn the Ice Cream
Pour the chilled base into your ice cream maker and churn according to the manufacturer’s instructions, usually 20–25 minutes. Once the mixture reaches a soft-serve consistency, fold in any add-ins and transfer to a freezer-safe container.
Freeze for 4–6 hours until firm and scoopable.
No-Churn Coffee Ice Cream (Easy Method)
Don’t have an ice cream maker? Try this simple no-churn method that uses whipped cream and condensed milk to replicate the texture of traditional ice cream.
Ingredients:
- 1 can (14 oz) sweetened condensed milk
- 2 cups heavy whipping cream
- ⅔ cup cold brewed coffee or espresso
- 1 teaspoon vanilla extract
Instructions:
- In a bowl, whisk together condensed milk, brewed coffee, and vanilla.
- In a separate bowl, whip heavy cream to stiff peaks.
- Gently fold the whipped cream into the coffee mixture until smooth and uniform.
- Pour into a loaf pan or container and cover with foil or a lid.
- Freeze for at least 6 hours before serving.
This version is less labor-intensive and still incredibly creamy and flavorful.
Flavor Variations to Try
- Mocha Ice Cream: Add ¼ cup unsweetened cocoa powder to the custard or mix melted dark chocolate into the base.
- Affogato-Inspired Swirl: Mix in a shot of espresso and a drizzle of caramel before freezing.
- Vegan Coffee Ice Cream: Use coconut milk, plant-based creamers, and maple syrup for a dairy-free twist.
Tips for the Creamiest Results
- Use high-fat dairy like heavy cream for maximum creaminess.
- Let the ice cream rest at room temperature for a few minutes before scooping.
- Store in an airtight container to prevent freezer burn.
- For a bolder coffee flavor, use espresso or concentrated cold brew.
How to Serve Coffee Ice Cream
Coffee ice cream is incredibly versatile. Enjoy it on its own, or pair it with your favorite desserts:
- Scoop into a waffle cone or coffee mug
- Serve alongside brownies or biscotti
- Use in an affogato: pour hot espresso over a scoop
- Make coffee ice cream sandwiches with chocolate cookies
- Add a scoop to your cold brew or iced latte for a decadent treat
Final Thoughts
Making homemade coffee ice cream is a rewarding and delicious way to combine your love of coffee with dessert. Whether you follow the classic churned method or try the no-churn shortcut, you’ll be amazed at the creamy texture and intense flavor you can achieve in your own kitchen.
With just a few simple ingredients and a bit of patience, your freezer can be stocked with the perfect pick-me-up treat for any time of day. In 2025, there’s no reason not to enjoy barista-level flavors in frozen form—made fresh by you.


