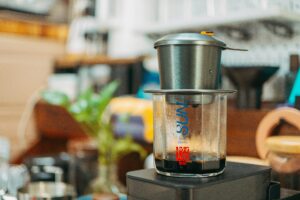
The AeroPress is one of the most versatile and beginner-friendly coffee makers on the market. Known for its smooth, rich coffee and easy cleanup, it’s loved by coffee enthusiasts worldwide. Whether you’re new to AeroPress or looking to perfect your technique, this guide will show you exactly how to use an AeroPress to brew a delicious cup every time.
Table of Contents
Why Choose the AeroPress?
Before diving into the step-by-step instructions, here’s why so many coffee lovers swear by the AeroPress:
- Brews coffee quickly—usually under 2 minutes
- Easy to clean and portable
- Creates a smooth, low-acid cup with minimal bitterness
- Allows for multiple brewing styles (standard and inverted)
- Affordable and durable
What You’ll Need
To make the perfect cup of AeroPress coffee, gather these essentials:
- AeroPress coffee maker
- AeroPress paper filter or metal reusable filter
- Freshly roasted coffee beans
- Burr grinder (for best results)
- Hot water (195°F to 205°F or about 90°C to 96°C)
- Stirrer or spoon
- Timer
- Mug
How to Use an AeroPress: Standard Method
The standard method is the most common and straightforward way to brew with the AeroPress.
Step 1: Measure and Grind Your Coffee
Start by measuring about 14 to 17 grams of coffee (roughly 2 to 3 tablespoons). Grind your beans to a medium-fine texture, similar to table salt. Freshly ground coffee gives the best aroma and taste.
Step 2: Place the Filter
Insert an AeroPress paper filter into the plastic cap and rinse it with hot water to remove any paper taste and preheat the brewer. Attach the cap to the brewing chamber.
Step 3: Add Coffee
Place the AeroPress on your mug or carafe. Add your ground coffee into the chamber.
Step 4: Pour Water
Pour hot water slowly over the coffee grounds until you reach about the number 4 mark on the AeroPress (approximately 200 ml or 7 oz of water). Start your timer as soon as you pour.
Step 5: Stir and Steep
Stir the coffee gently for about 10 seconds to make sure all the grounds are evenly saturated. Let it steep for 30 seconds to 1 minute depending on your flavor preference.
Step 6: Press
Insert the plunger into the chamber and press down slowly with steady pressure. The entire pressing process should take about 20 to 30 seconds. You’ll hear a hissing sound when it’s done.
Step 7: Serve and Enjoy
Remove the AeroPress from your mug and give your coffee a quick stir. Taste it as-is or dilute with a bit of hot water or milk if it’s too strong for your liking.
How to Use an AeroPress: Inverted Method
The inverted method gives you more control over steeping time and reduces the risk of dripping before you’re ready to press.
Step 1: Assemble the AeroPress
Insert the plunger into the brewing chamber just enough to seal it and stand the AeroPress upside down with the plunger at the bottom.
Step 2: Add Coffee and Water
Add your coffee grounds (14 to 17 grams) to the inverted chamber. Pour in your hot water slowly until it reaches near the top. Stir gently for 10 to 15 seconds.
Step 3: Steep
Allow the coffee to steep for about 1 to 2 minutes depending on how strong you want it.
Step 4: Attach Filter Cap
While it steeps, place the rinsed filter into the cap and screw it onto the chamber carefully.
Step 5: Flip and Press
Holding the AeroPress firmly, carefully flip it onto your mug in one swift motion. Begin pressing slowly and steadily until all the coffee is extracted.
Step 6: Serve
Stir your brewed coffee and adjust the strength by adding hot water or milk if desired.
AeroPress Brewing Tips for Better Flavor
- Use filtered water for cleaner taste
- Aim for water temperature between 195°F and 205°F (too hot can cause bitterness)
- Use freshly roasted beans and grind just before brewing
- Adjust coffee-to-water ratio and brew time to match your preferred strength
- Clean the AeroPress thoroughly after each use to prevent buildup
Popular AeroPress Recipes to Try
Once you’ve mastered the basics, experiment with these creative variations:
Cold Brew Style
Use room-temperature water and a longer steep time (up to 12 hours) for a smooth, rich cold brew.
AeroPress Latte
Brew a concentrated shot using less water, then top with steamed milk for a creamy latte-style drink.
Espresso-Like Coffee
Use a finer grind and less water to create a rich, concentrated coffee similar to espresso—perfect for making iced drinks or coffee-based cocktails.
Why AeroPress Is Great for Travel
One of the reasons the AeroPress is so popular is its portability. It’s lightweight, doesn’t require electricity, and is nearly unbreakable—perfect for travel, camping, or office brewing.
All you need is hot water, coffee, and your AeroPress to enjoy great coffee anywhere.
Final Thoughts
The AeroPress is a fantastic brewing tool that makes it easy to enjoy bold, smooth coffee at home or on the go. With a little practice and experimenting with grind size, ratios, and brew time, you can easily craft a cup that rivals your favorite coffee shop.
Whether you prefer the standard or inverted method, the AeroPress offers unmatched flexibility for coffee lovers of all experience levels.


